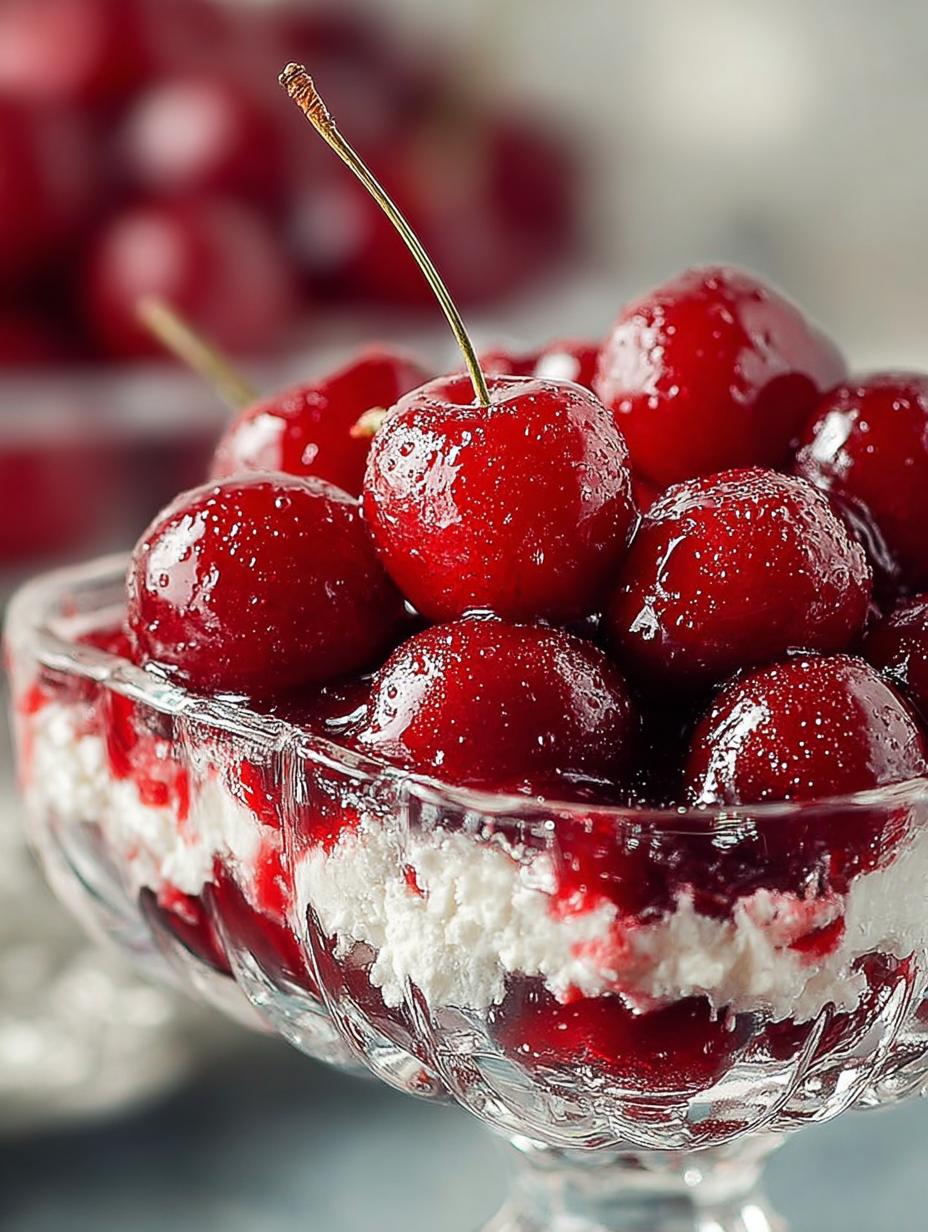
Vintage Cherries Snow is a creamy, dreamy no-bake dessert that brings back fond memories of holiday gatherings and cozy winter nights. This delightful treat features layers of buttery graham cracker crust, light and fluffy cream cheese filling, and a vibrant cherry pie topping, creating a perfect harmony of textures and flavors. With its nostalgic charm, this dessert not only satisfies your sweet tooth but also adds a festive touch to any occasion. Whether you’re hosting a potluck or celebrating a special holiday, Vintage Cherries Snow is sure to impress your guests and evoke warm memories.
Why You’ll Love This Vintage Cherries Snow
This dessert is more than just a sweet treat; it’s a nostalgic experience. Here are several reasons why you’ll adore it:
- It’s a no-bake dessert, making it easy and quick to prepare.
- The combination of textures—crunchy crust, creamy filling, and juicy cherries—is simply irresistible.
- This dessert is perfect for potlucks or family gatherings, bringing everyone together around a shared love for classic cherries snow.
- It can be made in advance, allowing you to enjoy your time with guests instead of being stuck in the kitchen.
- It’s versatile; you can create variations to match any theme, including vintage cherry-themed snow decorations.
- The vibrant cherry topping provides a visually appealing contrast, perfect for vintage cherries winter scenes.
- Rich in flavor yet simple in preparation, it fits beautifully into a vegetarian diet.
Ingredients for Vintage Cherries Snow
Gather these items:
- 1 and 1/2 cups graham cracker crumbs
- 1/4 cup granulated sugar
- 1/2 cup unsalted butter, melted
- 16 ounces cream cheese, softened
- 1 cup powdered sugar
- 1 and 1/2 teaspoons vanilla extract
- 1 cup heavy whipping cream
- 1 can (21 ounces) cherry pie filling
How to Make Vintage Cherries Snow Step-by-Step
- Step 1: In a medium bowl, mix graham cracker crumbs, granulated sugar, and melted butter until well combined. Press into the bottom of a 9×13 inch dish to form the crust. Refrigerate while you prepare the filling.
- Step 2: Beat softened cream cheese, powdered sugar, and vanilla extract in a large bowl until smooth and creamy.
- Step 3: In a separate bowl, whip the heavy cream until stiff peaks form.
- Step 4: Gently fold the whipped cream into the cream cheese mixture until well blended and fluffy.
- Step 5: Spread the cream mixture evenly over the chilled crust.
- Step 6: Spoon the cherry pie filling evenly over the cream layer, making sure not to press or swirl.
- Step 7: Cover and refrigerate for at least 4 hours or overnight for best results. Slice and serve chilled.

Pro Tips for the Perfect Vintage Cherries Snow
Keep these in mind:
- Perfect for potlucks and holiday treats.
- Can be made a day in advance.
- Keep refrigerated until ready to serve.
- Try adding a layer of nostalgic cherries snow decorations for a festive touch.
- Using fresh cherries instead of pie filling can elevate the flavor.
Best Ways to Serve Vintage Cherries Snow
For a delightful presentation, consider these serving ideas:
- Pair with a dollop of whipped cream on top for added richness.
- Serve slices on a vintage dessert plate for a charming look.
- Add a sprinkle of powdered sugar for an elegant finish, enhancing the vintage cherries snowflakes design.
How to Store and Reheat Vintage Cherries Snow
To store, cover the dish with plastic wrap and keep it refrigerated. This dessert can be prepared in advance, making it perfect for meal prep. When ready to serve, simply slice and enjoy—no reheating necessary!
Frequently Asked Questions About Vintage Cherries Snow
What’s the secret to perfect Vintage Cherries Snow?
The secret lies in allowing the dessert to chill properly. This ensures that the layers set well, creating a perfect blend of flavors and textures. Using fresh ingredients and allowing the whipped cream to be folded gently into the mixture will yield the best results.
Can I make Vintage Cherries Snow ahead of time?
Absolutely! This dessert is ideal for preparing a day in advance. Simply follow the instructions, refrigerate overnight, and serve the next day for a delightful treat that retains its flavor and texture.
How do I avoid common mistakes with Vintage Cherries Snow?
To avoid common mistakes, ensure all ingredients are at room temperature, especially the cream cheese. This helps in achieving a smooth filling. Also, be gentle when folding in the whipped cream to maintain its airy texture.
Variations of Vintage Cherries Snow You Can Try
If you’re feeling adventurous, consider these variations:
- Use different fruit pie fillings, such as blueberry or raspberry, for a unique twist.
- Add crushed nuts or chocolate shavings for added texture.
- Create a vintage cherries snow globe theme by decorating with themed toppings.
- Experiment with flavored extracts, like almond or coconut, to enhance the cream cheese filling.

For more delicious dessert ideas, check out our desserts category. If you’re interested in other no-bake options, you might enjoy our no-bake cheesecake squares. Additionally, for a refreshing fruit dessert, consider trying our cranberry orange ice cream.
For more information on the health benefits of cherries, you can visit Healthline.
Print
Vintage Cherries Snow: 7 Nostalgic Layers of Delight
- Total Time: 4 hours 25 minutes
- Yield: 12 servings 1x
- Diet: Vegetarian
Description
Creamy, dreamy, and no-bake dessert with layers of graham cracker crust, cream cheese filling, and cherry pie topping.
Ingredients
- 1 and 1/2 cups graham cracker crumbs
- 1/4 cup granulated sugar
- 1/2 cup unsalted butter, melted
- 16 ounces cream cheese, softened
- 1 cup powdered sugar
- 1 and 1/2 teaspoons vanilla extract
- 1 cup heavy whipping cream
- 1 can (21 ounces) cherry pie filling
Instructions
- In a medium bowl, mix graham cracker crumbs, granulated sugar, and melted butter until well combined. Press into the bottom of a 9×13 inch dish to form the crust. Refrigerate while you prepare the filling.
- Beat softened cream cheese, powdered sugar, and vanilla extract in a large bowl until smooth and creamy.
- In a separate bowl, whip the heavy cream until stiff peaks form.
- Gently fold the whipped cream into the cream cheese mixture until well blended and fluffy.
- Spread the cream mixture evenly over the chilled crust.
- Spoon the cherry pie filling evenly over the cream layer, making sure not to press or swirl.
- Cover and refrigerate for at least 4 hours or overnight for best results. Slice and serve chilled.
Notes
- Perfect for potlucks and holiday treats.
- Can be made a day in advance.
- Keep refrigerated until ready to serve.
- Prep Time: 25 minutes
- Cook Time: 0 minutes
- Category: Dessert
- Method: No-Bake
- Cuisine: American
Nutrition
- Serving Size: 1 slice
- Calories: 340
- Sugar: 23g
- Sodium: 250mg
- Fat: 20g
- Saturated Fat: 10g
- Unsaturated Fat: 8g
- Trans Fat: 0g
- Carbohydrates: 38g
- Fiber: 1g
- Protein: 3g
- Cholesterol: 60mg
Keywords: Vintage Cherries In the Snow, no-bake dessert, cherry pie filling, cream cheese dessert