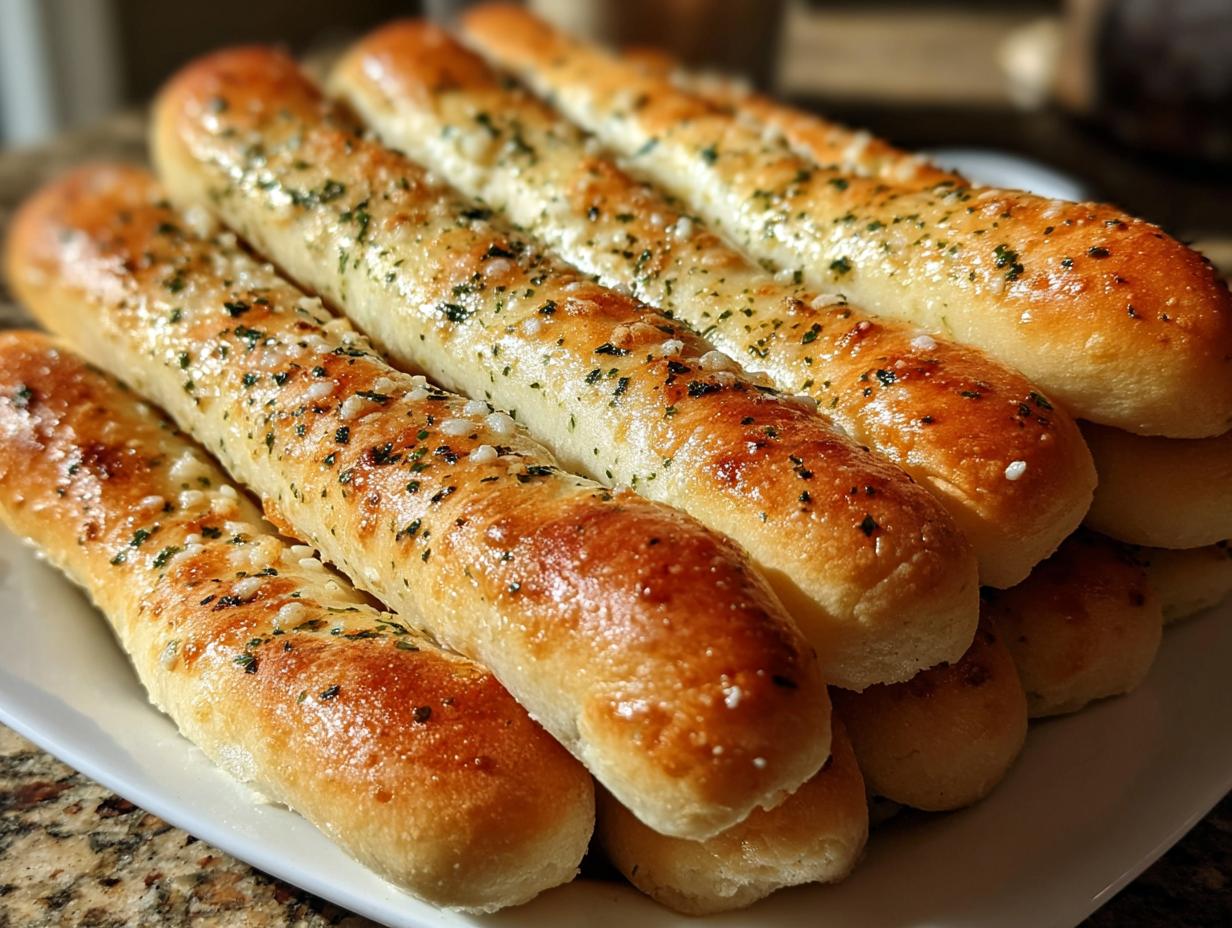
Olive Garden Breadsticks have been a dinnertime favorite for so many of us, myself included! I remember the first time I bit into one of those warm, garlicky, impossibly fluffy sticks at the restaurant – pure bliss. Now, I’ve figured out how to recreate that magic right in my own kitchen with this copycat Olive Garden breadsticks recipe. It’s surprisingly simple and delivers that same irresistible soft texture and hint of garlic that makes them so addictive. If you’ve been searching for an easy Olive Garden breadsticks recipe that tastes just like the real deal, you’ve found it. Get ready to impress yourself and everyone around your table. Let’s get cooking!
Why You’ll Love This Olive Garden Breadsticks Recipe
These aren’t just any breadsticks; they’re your ticket to restaurant-quality goodness without leaving home. Here’s why you’ll be making these again and again:
- Incredible taste that rivals the original, with that signature soft, slightly chewy texture.
- Super quick prep time means you can have warm breadsticks ready in about an hour.
- A budget-friendly way to enjoy a family favorite – so much cheaper than dining out!
- Perfectly kid-friendly, making them a hit for picky eaters at any meal.
- These homemade Olive Garden breadsticks are incredibly forgiving, even for beginner bakers.
- You get that satisfying garlic-butter flavor that’s simply irresistible.
- Making homemade Olive Garden breadsticks is a rewarding experience that fills your kitchen with amazing aromas.
- They’re versatile enough to serve with pasta, soup, or just as a delicious snack.
Ingredients for Homemade Olive Garden Breadsticks
Crafting these amazing Olive Garden breadsticks ingredients is simpler than you might think! You’ll need a few pantry staples to achieve that perfect soft and fluffy texture. The warm water and yeast work together to create that airy lift, while the sugar feeds the yeast, ensuring a good rise. A touch of vegetable oil keeps the dough tender, and all-purpose flour provides the structure. For that signature garlicky finish, we’ll brush them with melted butter and a sprinkle of garlic salt with parsley flakes right after they come out of the oven.
- 1 cup warm water (about 110°F) – essential for activating the yeast
- 1 tablespoon active dry yeast – the magic behind the rise
- 2 tablespoons sugar – food for the yeast
- 1 teaspoon salt – for flavor and dough structure
- 3 tablespoons vegetable oil – keeps the dough soft and tender
- 2 ½ cups all-purpose flour – plus more for dusting
- 2 tablespoons melted butter – for brushing after baking
- ½ teaspoon garlic salt with parsley flakes – for that classic garlicky flavor
How to Make Olive Garden Breadsticks
Ready to bring that warm, comforting taste of Olive Garden home? Making these copycat Olive Garden breadsticks is a truly rewarding process, and I promise, the aroma filling your kitchen will be incredible. Follow these simple steps to achieve that perfectly soft and fluffy texture everyone loves.
- Step 1: Let’s get that oven ready! Preheat your oven to 400°F (200°C). Line a large baking sheet with parchment paper; this makes cleanup a breeze and prevents sticking.
- Step 2: In a large bowl, combine your warm water, active dry yeast, and sugar. Give it a gentle stir and let it sit for about 5-10 minutes. You’ll know the yeast is happy when it gets nice and foamy – that means it’s alive and ready to work its magic!
- Step 3: Now, add the salt, vegetable oil, and 2 cups of the all-purpose flour to the foamy yeast mixture. Stir everything together until it’s just combined.
- Step 4: Gradually add the remaining ½ cup of flour, a little at a time, mixing as you go. You want the dough to pull away from the sides of the bowl and feel soft, maybe just a tiny bit sticky.
- Step 5: Turn the dough out onto a lightly floured surface. Knead it gently for about 5-7 minutes. If it feels too sticky, add just a sprinkle more flour, but be careful not to add too much. You’re aiming for a smooth, elastic dough.
- Step 6: Lightly grease a clean bowl and place your kneaded dough inside. Cover the bowl with a clean kitchen towel and let it rise in a warm spot for at least 30 minutes, or until it has doubled in size. This is where the dough gets its amazing fluffy texture!
- Step 7: Once the dough has risen, gently punch it down to release the air. Divide it into 12 equal pieces.
- Step 8: Roll each piece into a 9-inch rope. Place these ropes onto your prepared baking sheet, leaving a little space between them. This is the fun part – shaping your very own copycat Olive Garden breadsticks!

- Step 9: Cover the shaped breadsticks again with the towel and let them rise for another 20-30 minutes. They’ll get puffier and more inviting.
- Step 10: Bake for 12-15 minutes, or until they’re a beautiful golden brown. The smell is divine!
- Step 11: While they’re still warm, brush the tops with the melted butter and sprinkle generously with the garlic salt with parsley flakes. This step is crucial for that signature Olive Garden flavor!
Pro Tips for the Best Olive Garden Breadsticks
Want to elevate your homemade breadsticks to restaurant-quality perfection? I’ve picked up a few tricks that really make a difference in achieving that signature taste and texture.
- Don’t rush the first rise! Letting the dough double in size is key to that fluffy interior.
- Use a good quality garlic salt with parsley flakes for the topping; it really enhances the authentic flavor.
- For an extra boost of flavor, add a pinch of dried Italian herbs to the melted butter topping.
- Ensure your oven is fully preheated before baking to get that perfectly golden-brown crust.
What’s the secret to perfect Olive Garden breadsticks?
The secret lies in a few key things: ensuring your yeast is active, not overworking the dough, and that crucial final brush of garlic butter. This combination delivers that irresistible Olive Garden breadsticks taste everyone craves. For more baking tips, check out this guide on how to boil chicken breast, which also touches on essential cooking techniques.
Can I make Olive Garden breadsticks ahead of time?
Yes, you can prepare the dough ahead! After the first rise, punch it down, shape the breadsticks, and place them on the baking sheet. Cover and refrigerate for up to 24 hours before baking. Let them sit at room temperature for about 30 minutes before baking.
How do I avoid common mistakes with Olive Garden breadsticks?
A common pitfall is using water that’s too hot or too cold for the yeast; aim for around 110°F. Also, resist adding too much extra flour during kneading, as this can make your breadsticks tough instead of tender. Understanding yeast activation is crucial, similar to how you’d ensure active yeast for other baked goods like Hawaiian banana bread.
Best Ways to Serve Olive Garden Breadsticks
These amazing breadsticks are so versatile! They’re perfect for soaking up rich pasta sauces, like my favorite marinara or a creamy Alfredo. Imagine dipping these warm, fluffy sticks into a hearty bowl of minestrone soup – pure comfort food! For a delightful pairing, consider serving them alongside a classic Italian dinner or even as a tasty appetizer on their own. The irresistible aroma of these Olive Garden garlic breadsticks will have everyone reaching for more! You might also enjoy them with a side of cucumber caprese salad.
Olive Garden Breadsticks Nutrition Facts
Enjoying these delicious Olive Garden Breadsticks comes with a breakdown of their nutritional components. Each breadstick offers a satisfying bite that’s hard to resist. Understanding the details can help you incorporate them into your meal plan.
- Calories: 100
- Fat: 3g
- Saturated Fat: 0.5g
- Protein: 3g
- Carbohydrates: 18g
- Fiber: 1g
- Sugar: 1g
- Sodium: 150mg
Nutritional values are estimates and may vary based on specific ingredients and preparation methods.
How to Store and Reheat Olive Garden Breadsticks
Once your delicious Olive Garden breadsticks have cooled, storing them properly is key to maintaining their wonderful texture. I like to let them cool completely on a wire rack first. Then, place them in an airtight container or a resealable plastic bag. They’ll stay fresh at room temperature for up to two days, but if you want them to last longer, the refrigerator is your best bet for 3-4 days. For true long-term storage, freezing is fantastic! Wrap them well in plastic wrap, then foil, and they’ll be good in the freezer for up to 3 months.
Now, about how to reheat Olive Garden breadsticks to bring back that fresh-from-the-oven goodness: the oven is definitely the winner. Reheat them at around 350°F (175°C) for about 5-10 minutes, or until they’re warmed through. You can also pop them in a toaster oven. If you’re short on time, a microwave works, but they might not be quite as soft. Just a quick 15-20 seconds usually does the trick for a quick warm-up.
Frequently Asked Questions About Olive Garden Breadsticks
Are these copycat Olive Garden breadsticks exactly like the restaurant’s?
While I’ve worked hard to capture that signature soft, fluffy texture and garlic-parmesan flavor, there might be subtle differences. My goal with this Olive Garden breadsticks recipe is to get you as close as possible to that beloved taste at home. The key is the dough consistency and the final garlic butter brush! For more insights into recreating restaurant favorites, you might find this article on terms of use interesting, as it often relates to recipe development.
Can I make Olive Garden breadsticks with different flour?
You can try using bread flour for a chewier texture, but all-purpose flour is what gives these their classic tender crumb. I haven’t experimented much with gluten-free flours, but if you do, you might need to adjust the liquid and binding agents. For the best results, stick with all-purpose flour for these homemade Olive Garden breadsticks.
What can I serve with Olive Garden breadsticks besides soup or pasta?
These breadsticks are so versatile! They make a fantastic appetizer on their own with a side of marinara for dipping. You could also serve them with a hearty salad or as a side for grilled chicken or fish. Think of them as a delicious, garlicky vehicle for any meal you want to elevate! Try them with our rainbow orzo salad recipe for a complete meal.
Is it possible to get the Olive Garden unlimited breadsticks experience at home?
Absolutely! The beauty of making them yourself is that you can have as many as you want, whenever you want. You can easily double or triple this recipe to ensure you have a continuous supply of warm, delicious breadsticks, just like enjoying Olive Garden unlimited breadsticks at the restaurant, but from your own oven! If you’re looking for more dinner inspiration, explore our latest recipes.
Variations of Olive Garden Breadsticks You Can Try
Once you’ve mastered the classic version of these easy Olive Garden breadsticks, why not have a little fun and mix things up? I love experimenting with different flavors and methods to keep things exciting. Here are a few ideas to get you started:
- Cheesy Garlic Breadsticks: After brushing with the garlic butter, sprinkle generously with grated Parmesan cheese and a touch of mozzarella before baking. They become wonderfully gooey and irresistible!
- Herb-Infused Breadsticks: Add dried Italian seasoning or fresh chopped rosemary and thyme to the melted butter topping for an extra layer of aromatic flavor. This is a fantastic twist on the classic.
- Whole Wheat or Spelt Flour Version: For a slightly healthier spin, try substituting half of the all-purpose flour with whole wheat or spelt flour. This will change the texture slightly, making them a bit denser but still delicious.
- Air Fryer Breadsticks: If you’re short on time or just want to try a different cooking method, you can bake these in an air fryer! Arrange them in a single layer (you may need to work in batches) and air fry at 375°F (190°C) for 8-10 minutes, or until golden brown, brushing with garlic butter halfway through. For more air fryer ideas, check out our air fryer tortilla pizza recipe.


Olive Garden Breadsticks: Deliciously easy recipe
- Total Time: 1 hour
- Yield: 12 breadsticks 1x
- Diet: Vegetarian
Description
Learn to make delicious Olive Garden-style breadsticks at home. These breadsticks are soft, fluffy, and perfect for any meal. This easy recipe uses simple ingredients and provides a taste of the popular restaurant favorite.
Ingredients
- 1 cup warm water
- 1 tablespoon active dry yeast
- 2 tablespoons sugar
- 1 teaspoon salt
- 3 tablespoons vegetable oil
- 2 ½ cups all-purpose flour
- 2 tablespoons melted butter
- ½ teaspoon garlic salt with parsley flakes
Instructions
- In a large bowl, combine warm water, yeast, and sugar. Let it sit for 5-10 minutes, or until the mixture becomes foamy.
- Add salt, vegetable oil, and 2 cups of flour to the yeast mixture. Stir until combined.
- Gradually add the remaining flour, ¼ cup at a time, until the dough pulls away from the sides of the bowl and is soft yet slightly sticky.
- Turn the dough onto a lightly floured surface and knead for about 5-7 minutes, adding flour as needed to prevent sticking.
- Place the kneaded dough into a lightly greased bowl. Cover with a clean kitchen towel and let it rise for at least 30 minutes, or until doubled in size.
- Once risen, punch down the dough gently. Divide it into 12 equal portions.
- Roll each portion into a 9-inch rope and place it on a parchment-lined baking sheet.
- Cover the shaped breadsticks with a towel and let them rise again for 20-30 minutes.
- Bake in a preheated oven until golden brown. Brush with melted butter and garlic salt with parsley flakes immediately after baking.
Notes
- Ensure warm water is around 110°F for optimal yeast activation.
- Patience during the rising process is crucial for achieving the best texture.
- If your kitchen is cool, place the dough near a warm oven to aid rising.
- Brush breadsticks with melted butter just before serving for enhanced flavor.
- Experiment with toppings like grated cheese or Italian herbs for variations.
- Store leftovers in an airtight container at room temperature for up to two days. Reheat in the oven to restore softness.
- Dough can be prepared ahead and refrigerated. Bring to room temperature before shaping and rising.
- Instant yeast can be substituted for active dry yeast; mix directly with dry ingredients.
- For a vegan option, substitute butter with a plant-based alternative and omit garlic salt with parsley flakes if it contains dairy.
- Prep Time: 15 minutes
- Cook Time: 15 minutes
- Category: Bread
- Method: Baking
- Cuisine: Italian
Nutrition
- Serving Size: 1 breadstick
- Calories: 100
- Sugar: 1g
- Sodium: 150mg
- Fat: 3g
- Saturated Fat: 0.5g
- Unsaturated Fat: 2g
- Trans Fat: 0g
- Carbohydrates: 18g
- Fiber: 1g
- Protein: 3g
- Cholesterol: 0mg
Keywords: Olive Garden Breadsticks, homemade Olive Garden breadsticks, Olive Garden breadsticks recipe, copycat Olive Garden breadsticks, Olive Garden breadsticks ingredients, easy Olive Garden breadsticks, Olive Garden garlic breadsticks, Olive Garden unlimited breadsticks, Olive Garden breadsticks calories, Olive Garden breadsticks nutrition