Halloween breadsticks have become my absolute favorite way to kick off our annual spooky celebrations. I remember one year, my kids were begging for something fun to munch on while we carved pumpkins, and I whipped up these simple breadsticks. The look on their faces when they saw the little ghosts and mummies I’d made with them was pure magic! The warm, savory aroma filling the house, combined with the delightful, playful shapes, made it an instant hit. If you’re wondering what are spooky breadstick ideas for Halloween, you’ve come to the right place. These aren’t just a treat; they’re a whole vibe! Let’s get cooking!
Why You’ll Love These Halloween Breadsticks
These spooky delights are a guaranteed hit for so many reasons! You’ll adore the incredible taste, a perfect blend of savory and slightly cheesy, making them irresistible. Plus, they’re surprisingly quick to prepare, fitting perfectly into busy holiday schedules. These are some of the most easy Halloween breadstick recipes you’ll find, requiring minimal fuss. They’re also budget-friendly, using common pantry staples to create a big impact. Even better, they’re a fantastic way to get the whole family involved, making memories together. You’ll be amazed at how simple these easy Halloween breadstick recipes are to customize for any party. They’re the perfect appetizer that’s both fun and delicious!
Ingredients for Spooky Halloween Breadsticks
Gather these simple ingredients for a frightfully fun baking session. You’ll need 2 cups (250g) all-purpose flour, plus a little extra for dusting your workspace. We also need 1 teaspoon salt and 1 teaspoon sugar for flavor balance. For that perfect rise, grab 1 packet (2 1/4 teaspoons) active dry yeast and 1 cup (240ml) warm water, ideally between 105-115°F. A little 2 tablespoons olive oil adds richness, while 1 large egg, beaten, helps bind everything. For that savory kick, have 1/2 cup (60g) grated Parmesan cheese and 1/4 cup (30g) finely chopped fresh rosemary ready. These are key for our Halloween breadstick decorations; we’ll use 1/2 cup (60g) almond slivers for bone shapes and 1/4 cup (30g) black sesame seeds for spooky eyes. Don’t forget orange food coloring gel or paste and black food coloring gel or paste to add festive color to your creations. Finally, a bit of melted butter, for brushing, gives them a lovely golden finish.
How to Make Halloween Breadsticks: Step-by-Step Guide
Let’s get these spooky treats in the oven! Making Halloween breadsticks is a fun process that yields delicious results. First things first, we need to preheat our oven to 400°F (200°C). While that’s heating up, line a baking sheet with parchment paper so nothing sticks.
- Step 1: In a large bowl, I like to whisk together the 2 cups (250g) all-purpose flour, 1 teaspoon salt, and 1 teaspoon sugar. Then, I create a little well in the center – it’s like making a little nest for our yeast!
- Step 2: In a separate small bowl, combine the 1 cup (240ml) warm water with the 1 packet (2 1/4 teaspoons) active dry yeast. Let this sit for about 5-10 minutes. You’ll know it’s ready when it gets nice and foamy; that means the yeast is alive and ready to work its magic!
- Step 3: Pour that active yeast mixture into the well in your flour. Add the 2 tablespoons olive oil and the 1 large egg, beaten. Now, mix everything together until you get a shaggy dough. Don’t worry if it looks a bit messy at this stage; that’s normal!
- Step 4: Turn the dough out onto a lightly floured surface. It’s time to knead! Work the dough for about 5-7 minutes until it becomes smooth and elastic. If it feels too sticky, just add a little more flour. This kneading is key to how to make Halloween breadsticks that have a great texture.
- Step 5: Lightly grease a large bowl with olive oil. Place your kneaded dough in the bowl, turning it over to coat all sides. Cover the bowl and let it rest in a warm spot for about 1 hour, or until it’s beautifully doubled in size. I love watching it puff up!
- Step 6: Once the dough has risen, gently punch it down to release the air.
- Step 7: On your floured surface again, roll out the dough to about 1/4 inch thickness.
- Step 8: Now, cut the dough into 1/2-inch wide strips. These will be our breadsticks!
- Step 9: Arrange the breadstick strips onto your prepared baking sheet, leaving some space between each one so they have room to bake up nicely.
- Step 10: In a small bowl, mix together the 1/2 cup (60g) grated Parmesan cheese and the 1/4 cup (30g) finely chopped fresh rosemary. Sprinkle this savory mixture generously over all your breadsticks.
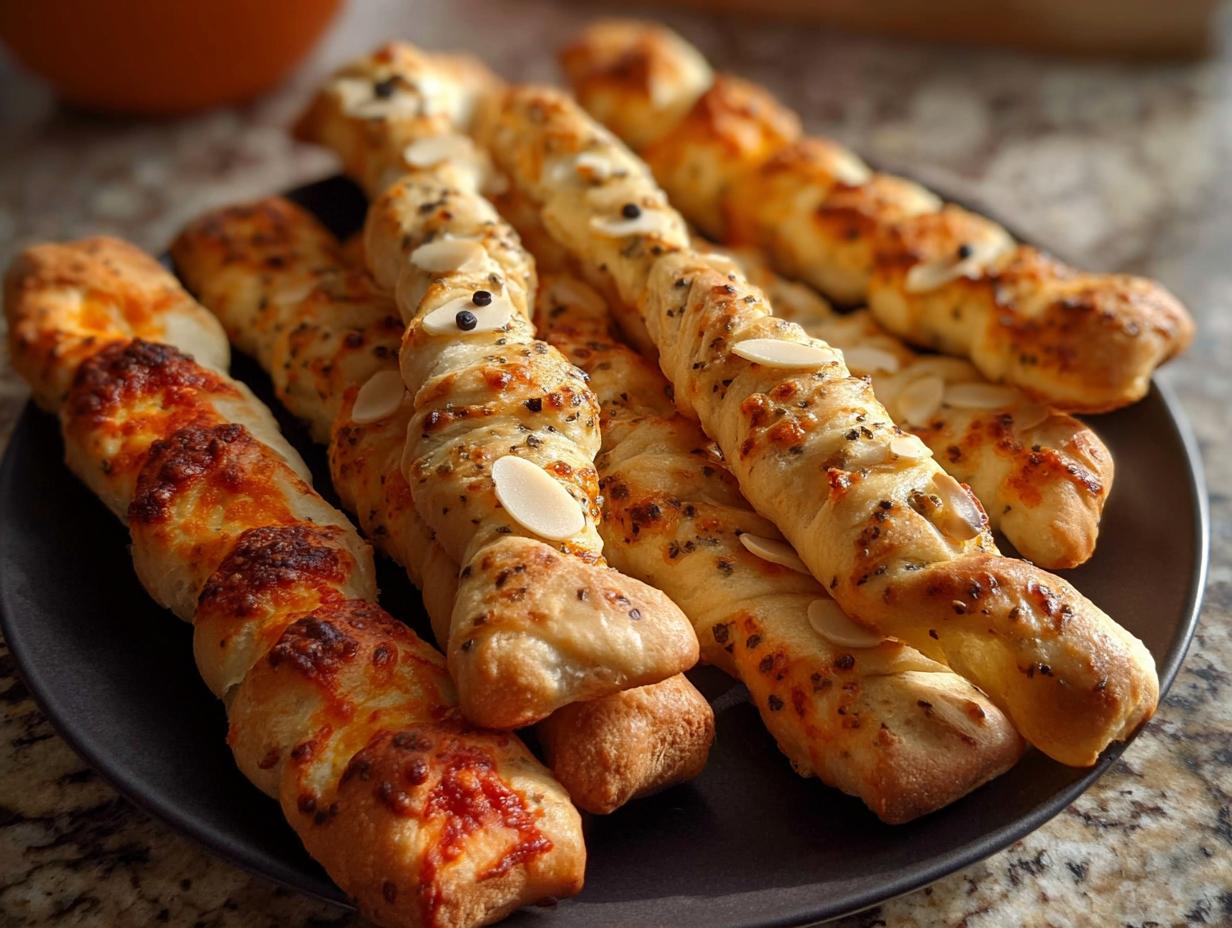
- Step 11: For those spooky bone shapes, carefully arrange almond slivers along some of the breadsticks.
- Step 12: To create little monster eyes, gently press black sesame seeds onto the dough.
- Step 13: For a truly festive look, take small portions of the dough and knead in a bit of orange food coloring gel or paste or black food coloring gel or paste. Shape these colored dough pieces into fun Halloween shapes or add them as accents. This is where the magic of how to make Halloween breadsticks really shines!
- Step 14: Before baking, brush the tops of all the breadsticks with melted butter.
- Step 15: Bake for 12-15 minutes, or until they are beautifully golden brown and smell amazing.
- Step 16: Once baked, remove them from the baking sheet and let them cool slightly on a wire rack.
- Step 17: Serve these delicious Halloween breadsticks warm with your favorite dipping sauce, like marinara, pesto, or garlic butter. Enjoy your spooky creations!

Creative Halloween Breadstick Designs: Spooky Ideas to Try
Now for the really fun part – decorating! To make your Halloween breadsticks truly stand out, consider these creative ideas. For mummy breadsticks, use thin strips of dough to wrap around a ghost-shaped base, leaving a gap for eyes made from sesame seeds. To create spiderweb Halloween breadsticks, pipe a spiral of white icing or melted cheese onto a baked breadstick and drag a toothpick from the center outward. For monster breadsticks, get wild with different colored doughs, adding googly candy eyes or even candy corn teeth. Don’t be afraid to experiment with fun Halloween breadstick shapes like bats or pumpkins using cookie cutters before baking. These simple touches elevate your appetizer game! For more baking inspiration, check out our cheesy breadsticks recipe.
What’s the secret to perfect Halloween breadstick dough?
The key is a well-hydrated dough and proper proofing. Ensuring your yeast is active and giving the dough enough time to rise in a warm place is crucial. Following these Halloween breadstick baking tips will result in a light, airy texture, perfect for decorating. Learn more about the science behind baking with our guide on how long to boil chicken breast, which touches on yeast activation.
Can I make Halloween breadsticks ahead of time?
Yes, you absolutely can! You can prepare the dough, shape it, and even add the decorations up to 24 hours in advance. Cover them tightly and refrigerate. When ready to bake, let them sit at room temperature for about 20 minutes before baking as usual, adding a couple of extra minutes to the bake time.
How do I avoid common mistakes with spooky Halloween breadstick designs?
A common pitfall is overcrowding the baking sheet, which prevents even baking and browning. Make sure to leave space between each breadstick. Another mistake is using too much moisture for decorations before baking, which can make the dough soggy. For spooky Halloween breadstick designs, ensure any wet toppings are applied after baking or that they are heat-stable. Proper baking techniques are essential, much like when preparing oven-baked salmon.
Halloween Breadstick Serving Ideas and Dipping Sauces
These festive treats are perfect for any spooky gathering! For fantastic Halloween breadstick serving ideas, arrange them on a platter shaped like a pumpkin or a tombstone. You can also serve them alongside a hearty Halloween-themed soup, like a creamy pumpkin bisque or a spooky black bean soup, for a complete meal. When it comes to complementary sides, a fresh salad with a blood-orange vinaigrette or some roasted root vegetables would be wonderful. And, of course, you can’t forget the dips! Offering a variety of Halloween breadstick dipping sauces will make them even more irresistible. Think classic marinara, a vibrant green pesto, or a creamy garlic butter dip. These pairings ensure your spooky appetizers are a hit! For more appetizer ideas, explore our lunch recipes.
Nutrition Facts for Halloween Breadsticks
Here’s a breakdown of the estimated nutritional information per breadstick, so you know what you’re serving up for your spooky feast:
- Calories: 150
- Fat: 5g
- Saturated Fat: 1.5g
- Protein: 5g
- Carbohydrates: 20g
- Fiber: 1g
- Sugar: 2g
- Sodium: 250mg
Nutritional values are estimates and can vary based on the specific ingredients and portion sizes used in your Halloween breadsticks.
How to Store and Reheat Halloween Breadsticks
Properly storing your spooky creations ensures they stay delicious for your guests. Once your Halloween appetizer breadsticks have cooled completely on a wire rack, place them in an airtight container or a resealable plastic bag. For short-term storage, they’ll keep well in the refrigerator for about 3 to 4 days. If you want to save them for longer, freezing is your best bet! Wrap cooled breadsticks tightly in plastic wrap, then in aluminum foil, and they’ll stay fresh in the freezer for up to 3 months. When you’re ready to reheat, you can simply pop them into a preheated oven at 350°F (175°C) for about 5-7 minutes until warm and slightly crisp. You can also reheat them gently in a toaster oven or even a microwave for a quick fix, though the oven yields the best texture. For more storage tips, consider our terms of use which may contain relevant information.
Frequently Asked Questions About Halloween Breadsticks
Are these Halloween breadsticks easy to make for beginners?
Absolutely! These Halloween breadsticks recipes are designed to be incredibly beginner-friendly. The dough is forgiving, and the decorating is all about fun, not perfection, making them perfect kid-friendly Halloween breadstick ideas. You’ll find the steps straightforward and rewarding.
What are some other spooky Halloween breadstick designs I can try?
Beyond ghosts and mummies, you can create monster breadsticks with candy eyes and jagged dough mouths, or even spiderweb Halloween breadsticks by drizzling melted cheese or white sauce and dragging a toothpick. For a simpler approach, just use different colored doughs for a vibrant, festive look that still screams Halloween!
Can I use store-bought dough for these Halloween breadsticks?
Yes, you can definitely use store-bought pizza dough or breadstick dough to save time! Just follow the decorating and baking instructions from our Halloween breadsticks recipes. It’s a fantastic shortcut if you’re short on time but still want that homemade spooky charm.
What are the best dipping sauces to serve with these Halloween breadsticks?
For a classic pairing, marinara sauce is always a winner. A creamy garlic butter dip or a vibrant pesto also complement the savory flavors beautifully. For a themed touch, consider a spooky green guacamole or a blood-red beet dip for extra Halloween flair! You might also enjoy our best boom boom sauce recipe.
Variations of Halloween Breadsticks for Every Party
Want to mix up your spooky spread? These Halloween breadsticks are incredibly versatile! For a gluten-free twist, you can easily swap the all-purpose flour for a good quality gluten-free blend. Just be sure to adjust the liquid slightly as GF flours can absorb differently. If you’re short on time, consider using store-bought refrigerated breadstick dough or pizza dough as a base – the decorating magic is still the star! Embrace fun Halloween breadstick shapes by using cookie cutters before baking to create bats, pumpkins, or even little skulls. For truly monstrous creations, try dividing the dough and coloring portions with black and orange food coloring to craft vibrant monster Halloween breadsticks with edible candy eyes and piped icing details. Check out our single rise gluten-free bread for more gluten-free baking ideas.
Print
Terrifying Halloween Breadsticks Spooky Ideas
- Total Time: 35-40 minutes
- Yield: 20 breadsticks 1x
- Diet: Vegetarian
Description
Create frightfully delicious and easy Halloween breadsticks with this recipe. Perfect for parties, these savory treats can be customized with spooky designs using simple ingredients.
Ingredients
- 2 cups (250g) all-purpose flour, plus extra for dusting
- 1 teaspoon salt
- 1 teaspoon sugar
- 1 packet (2 1/4 teaspoons) active dry yeast
- 1 cup (240ml) warm water (105-115°F)
- 2 tablespoons olive oil
- 1 large egg, beaten
- 1/2 cup (60g) grated Parmesan cheese
- 1/4 cup (30g) finely chopped fresh rosemary
- 1/2 cup (60g) almond slivers, for “bones”
- 1/4 cup (30g) black sesame seeds, for “eyes”
- Orange food coloring gel or paste
- Black food coloring gel or paste
- Melted butter, for brushing
Instructions
- In a large bowl, whisk together flour, salt, and sugar. Make a well in the center.
- In a small bowl, combine warm water and yeast. Let stand 5-10 minutes until foamy.
- Pour yeast mixture into the flour well. Add olive oil and beaten egg. Mix until a shaggy dough forms.
- Turn dough onto a lightly floured surface and knead for 5-7 minutes, until smooth and elastic. Add more flour if needed.
- Lightly grease a large bowl with olive oil. Place dough in the bowl, turning to coat. Cover and let rise in a warm place for 1 hour, or until doubled.
- Gently punch down the risen dough.
- On a lightly floured surface, roll out dough to 1/4 inch thickness.
- Cut dough into 1/2-inch wide strips.
- Place breadsticks onto a parchment-lined baking sheet, leaving space between each.
- Combine Parmesan cheese and rosemary. Sprinkle over breadsticks.
- Arrange almond slivers along some breadsticks like bones.
- Press black sesame seeds onto dough to create eyes.
- Add orange or black food coloring to small portions of dough before shaping for a festive touch.
- Preheat oven to 400°F (200°C).
- Brush breadsticks with melted butter.
- Bake for 12-15 minutes, or until golden brown.
- Remove and let cool slightly on a wire rack before serving.
- Serve with your favorite dipping sauce (marinara, pesto, garlic butter).
Notes
- Do not over-knead the dough.
- Proper rising is crucial for a light texture.
- Use high-quality ingredients.
- Get creative with decorations!
- Prep Time: 20 minutes
- Cook Time: 12-15 minutes
- Category: Appetizer
- Method: Baking
- Cuisine: American
Nutrition
- Serving Size: 1 breadstick
Keywords: Halloween Breadsticks, Spooky Ideas, Halloween breadsticks recipes, Spooky Halloween breadstick designs, Creative Halloween breadstick ideas, Easy Halloween breadstick recipes, Fun Halloween breadstick shapes, Halloween appetizer breadsticks, Kid-friendly Halloween breadstick ideas, How to make Halloween breadsticks, Halloween breadstick decorations, Spiderweb Halloween breadsticks, Mummy Halloween breadsticks, Ghost Halloween breadsticks, Monster Halloween breadsticks, Spooky party breadsticks, Halloween themed breadsticks, Best Halloween breadstick recipes, Halloween breadstick serving ideas, Halloween breadstick dipping sauces, Halloween breadstick baking tips, Spooky breadstick ideas for Halloween