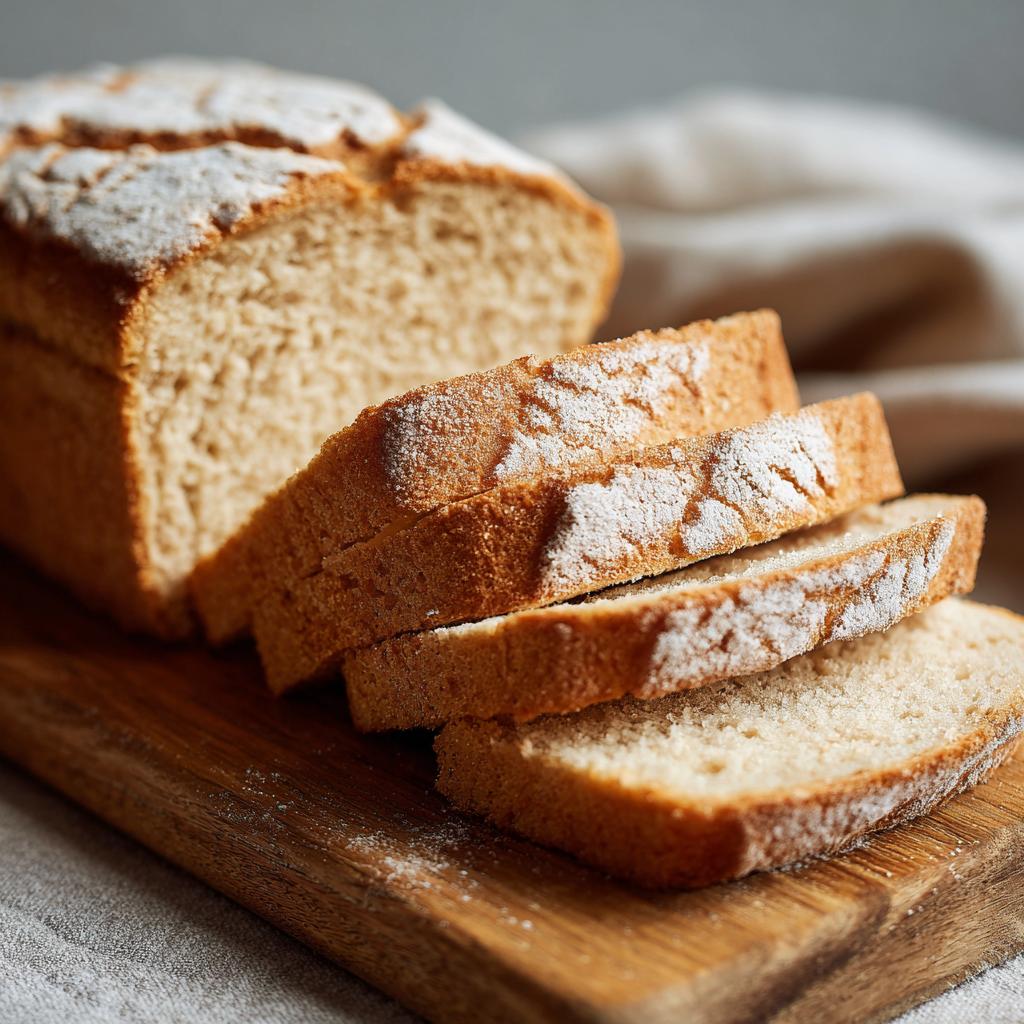
Single Rise Gluten Free Bread is a dream come true for anyone who loves fresh bread but struggles with gluten-free baking! I remember the days of dense, crumbly gluten-free loaves that were more trouble than they were worth. But then I discovered this recipe, and everything changed. This method is all about simplicity and speed, without sacrificing that classic bread taste and texture. The aroma of this easy single rise gluten free bread for sandwiches baking in the oven? Pure heaven. It fills the kitchen with a warm, comforting scent that makes you want to slather a thick slice with butter the moment it’s cool enough to handle. Let’s bake!
Why You’ll Love This Single Rise Gluten Free Bread
- It’s so easy to make, with just one rise! Trust me, you’ll be amazed at how simple it is.
- Perfect for sandwiches and toast. Finally, a gluten-free slice that holds up!
- It’s completely gluten-free and utterly delicious. No compromise on taste here!
- Minimal prep time means you can have freshly baked bread on the table in under two hours.
- Uses simple, everyday ingredients you probably already have in your pantry.
- The texture and flavor are spot-on, giving you that satisfying bread experience we all crave.
- It’s budget-friendly, saving you from those expensive store-bought gluten-free loaves.
- You can enjoy fresh baked bread quickly – no need to wait all day for that homemade goodness.
Ingredients for Single Rise Gluten Free Bread
- 3 cups Caputo Gluten Free Flour (Trust me, use a high-quality blend for the best results. It provides the structure for our loaf!)
- 2 tbsp granulated sugar (This adds just the right amount of sweetness and feeds the yeast, helping it do its thing.)
- 2 tbsp psyllium husk powder (This is essential for binding and giving the bread that perfect texture. Don’t even think about skipping it!)
- 1 1/2 tsp baking powder (We’re using this for an extra lift and lightness. Every little bit helps, right?)
- 1 tbsp quick-rise instant yeast (This ensures a fast rise, so check the expiration date to make sure it’s still good to go!)
- 2 tsp xanthan gum (Xanthan gum improves the texture and prevents the bread from crumbling. A must-have for gluten-free baking!)
- 2 tsp salt (Salt enhances the flavor and controls the yeast activity. Don’t underestimate its importance!)
- 1/4 tsp cream of tartar (This helps stabilize the dough, ensuring a consistent rise and texture.)
- 1 1/2 cups warm water (The temperature is crucial here! It activates the yeast, so make sure it’s not too hot or too cold.)
- 1/4 cup butter melted (Butter adds richness and flavor. If you’re dairy-free, a dairy-free alternative works great, too!)
- 1 tsp apple cider vinegar (This enhances the flavor and helps with the texture. It’s my little secret ingredient!)
How to Make Single Rise Gluten Free Bread
- Step 1: Combine dry ingredients: In your stand mixer, toss in the flour, psyllium husk powder, baking powder, xanthan gum, yeast, cream of tartar, sugar, and salt. Give it a whirl on low speed until everything’s nicely mixed.
- Step 2: Melt butter: Pop the butter in the microwave until it’s completely melted. This usually takes about 30-45 seconds.
- Step 3: Add wet ingredients: With the mixer still running on low, slowly pour in the warm water. Then, drizzle in the melted butter and the apple cider vinegar.
- Step 4: Mix the dough: Crank the mixer up to medium speed and let it go for about 5 minutes. Don’t forget to scrape down the sides of the bowl halfway through to make sure everything gets evenly mixed. The dough will be sticky – that’s totally normal!
- Step 5: Prepare the pan: Grab an 8″ x 4″ loaf pan and grease it like you mean it! You don’t want the bread sticking later.
- Step 6: Shape and rise: Scrape that beautiful dough into the prepared loaf pan and smooth the top with a spatula. It should look nice and even.
- Step 7: First Rise: Cover the pan with plastic wrap and let it rise in a warm spot for 1 hour. I usually put mine near the oven while it preheats!
- Step 8: Preheat oven: Towards the end of the rising time, preheat your oven to 375°F (190°C). You want that oven nice and hot!
- Step 9: Bake: Pop the loaf pan into the preheated oven and bake for 35 minutes. Keep an eye on it – you want it to be golden brown. The kitchen should smell amazing by now!
- Step 10: Check for doneness: Take the loaf out and flip it out of the pan. Give the bottom a tap; if it sounds hollow, you’re golden!
- Step 11: Cool: If the bread is done, transfer it to a cooling rack and let it cool completely before slicing. I know it’s tempting, but trust me, it’s worth the wait!
- Step 12: Slice and enjoy: Once cooled, slice the Single Rise Gluten Free Bread and enjoy! I love mine with a pat of butter or toasted with some avocado.
Pro Tips for the Best Single Rise Gluten Free Bread
Want to take your single rise gluten-free bread to the next level? These little tricks have made all the difference in my loaves. Trust me; they’re worth it!
What’s the secret to perfect Single Rise Gluten Free Bread?
It’s all about precision! Use a kitchen scale to measure your flour. This ensures accuracy and consistent results, as gluten-free flour blends can vary in density. Trust me on this one!
Can I make Single Rise Gluten Free Bread ahead of time?
Absolutely! Yes, you can bake this gluten-free bread ahead of time and store it at room temperature for a day or two. For longer storage, slice before freezing for easy access to individual portions. It thaws like a charm!
How do I avoid common mistakes with Single Rise Gluten Free Bread?
Easy! Avoid overmixing the dough – that’s a big one. Mix just until the ingredients are combined. And please, please, please don’t skip the psyllium husk. It’s essential for that perfect texture in this homemade gluten-free bread!
Best Ways to Serve Single Rise Gluten Free Bread
Okay, so you’ve got this amazing single rise gluten-free bread – now what? Well, the possibilities are endless, but here are some of my absolute favorite ways to enjoy it:
- Toasted with avocado and a sprinkle of sea salt. Seriously, the creamy avocado with the slight crunch of the toast? Perfection!
- As a base for a delicious gluten-free sandwich with your favorite fillings. Finally, a gluten-free loaf that can handle a proper sandwich without falling apart!
- Alongside a hearty soup or stew for dipping. Nothing beats sopping up all that delicious broth with a slice of this homemade bread.
- Make French toast. This gluten-free bread soaks up the custard beautifully and makes for an extra special breakfast treat!

Nutrition Facts for Single Rise Gluten Free Bread
Alright, let’s talk numbers! Here’s what you can expect in each slice of this delicious single rise gluten-free bread. Keep in mind, this is just an estimate, but it’ll give you a good idea:
- Serving Size: 1 slice
- Calories: 200
- Sugar: 5g
- Sodium: 300mg
- Fat: 8g
- Saturated Fat: 5g
- Unsaturated Fat: 3g
- Trans Fat: 0g
- Carbohydrates: 30g
- Fiber: 3g
- Protein: 4g
- Cholesterol: 20mg
Note: Nutritional information is an estimate and may vary based on specific ingredients and preparation methods. So, you know, enjoy that gluten-free loaf without too much worry!
How to Store and Reheat Single Rise Gluten Free Bread
Okay, you’ve baked your beautiful single rise gluten free bread, and now you want to keep it fresh, right? Here’s the lowdown on storing and reheating, so you can enjoy every last crumb!
- Storage: Once it’s completely cooled, pop your gluten-free loaf into an airtight container. It’ll stay lovely at room temperature for up to 2 days, or you can stash it in the fridge for up to 5. I usually go for the fridge if it’s humid!
- Freezing: Planning on keeping it longer? Slice the homemade bread first, then slide it into a freezer-safe bag. It’ll keep for up to 2 months! This way, you can just grab a few slices whenever you need them.
- Reheating: To bring back that fresh-baked yumminess, reheat slices in a toaster or oven to restore that lovely crispness and flavor. If they’re frozen, just let ’em thaw first. Trust me, it’s worth the little bit of extra effort!
Frequently Asked Questions About Single Rise Gluten Free Bread
Got questions about baking this amazing single rise gluten free bread? Don’t worry, I’ve got answers! Here are a few of the most common questions I get, plus some extra tips to help you bake the perfect loaf.
Why is my Single Rise Gluten Free Bread dense?
Ah, the dreaded dense loaf! There are a few culprits that could be to blame. First, did you use the correct amount of psyllium husk? It’s crucial for binding and creating that airy texture. Also, was your yeast fresh and active? Old yeast won’t give you the rise you need. Finally, did you measure the flour correctly? Gluten-free flours can be tricky, so using a kitchen scale is always best for accuracy.
Can I use different gluten-free flour?
While I highly recommend the Caputo gluten-free flour for this recipe, I get it – sometimes you need to use what you have! Will a different flour change the texture? Absolutely, different blends have different properties. You may also need to adjust the liquid if you change the flour since some flours absorb more moisture than others. Keep an eye on the dough and add a little more water if it seems too dry.
What if my Single Rise Gluten Free Bread doesn’t rise enough?
A flat loaf is no fun! First, was the water warm enough to activate the yeast? Too hot, and you’ll kill the yeast; too cold, and it won’t wake up. Also, is your rising environment warm enough? A drafty kitchen can slow down the rising process. Finally, did you use the correct amount of yeast? Double-check that you added the full tablespoon!
Variations of Single Rise Gluten Free Bread You Can Try
Okay, so you’ve mastered the basic single rise gluten free bread recipe – awesome! Now, let’s get a little adventurous! Here are a few fun tweaks to try that will totally change up the flavor profile and keep things interesting. Trust me, these are all winners!
- Vegan Single Rise Gluten Free Bread: Just swap out the butter with melted coconut oil or vegan butter. It works like a charm, and you won’t even miss the dairy!
- Single Rise Gluten Free Bread with seeds: Add about 1/4 cup of mixed seeds (sunflower, pumpkin, flax – whatever you like!) to the dough before baking. It adds a lovely nutty flavor and a fantastic texture.
- Sweet Single Rise Gluten Free Bread: Craving something a little sweeter? Toss in 1/4 cup of raisins or dried cranberries and a teaspoon of cinnamon to the dough. It’s like a gluten-free cinnamon raisin bread, but even better!
- Savory Single Rise Gluten Free Bread: For a more savory twist, add 1/4 cup of chopped sun-dried tomatoes and a teaspoon of dried oregano to the dough. This is amazing toasted with a little olive oil and a sprinkle of parmesan (if you’re not going the vegan route, of course!).

Single Rise Gluten Free Bread: Avoid These 3 Horrible Sins
- Total Time: 1 hour 45 minutes
- Yield: 1 loaf 1x
- Diet: Gluten Free
Description
Single Rise Gluten Free Bread combines fast rising convenience with yeasted loaf structure and flavor.
Ingredients
- 3 cups Caputo Gluten Free Flour
- 2 tbsp granulated sugar
- 2 tbsp psyllium husk powder
- 1 1/2 tsp baking powder
- 1 tbsp quick-rise instant yeast
- 2 tsp xanthan gum
- 2 tsp salt
- 1/4 tsp cream of tartar
- 1 1/2 cups warm water
- 1/4 cup butter melted
- 1 tsp apple cider vinegar
Instructions
- Mix flour, psyllium husk powder, baking powder, xanthan gum, yeast, cream of tartar, sugar, and salt in a stand mixer on low.
- Melt the butter in the microwave.
- Pour in the warm water while the mixer is turning on low speed.
- Pour in the butter while the mixer is turning on low speed.
- Add the apple cider vinegar while the mixer is turning on low speed.
- Mix on medium speed for about 5 minutes. Scrape sides of the bowl at the half way point.
- Grease an 8″ x 4″ loaf pan.
- Scrape the bread dough into the loaf pan and smooth the top.
- Cover with plastic wrap and let stand for 1 hour.
- Preheat oven to 375F.
- Place the baking pan in the preheated oven for 35 minutes.
- Remove and flip the loaf out. Check for doneness by tapping the bottom of the loaf. Should feel and sound hollow.
- If done transfer to a cooling rack.
- Once cooled the loaf can be sliced.
- Enjoy!
Notes
- Ensure all ingredients are gluten-free.
- Use a reliable gluten-free flour blend for best results.
- Adjust rising time based on your environment.
- Prep Time: 10 minutes
- Cook Time: 35 minutes
- Category: Bread
- Method: Baking
- Cuisine: Gluten-Free
Nutrition
- Serving Size: 1 slice
- Calories: 200
- Sugar: 5g
- Sodium: 300mg
- Fat: 8g
- Saturated Fat: 5g
- Unsaturated Fat: 3g
- Trans Fat: 0g
- Carbohydrates: 30g
- Fiber: 3g
- Protein: 4g
- Cholesterol: 20mg
Keywords: Single Rise Gluten Free Bread, gluten-free bread, bread recipe, baking, quick bread