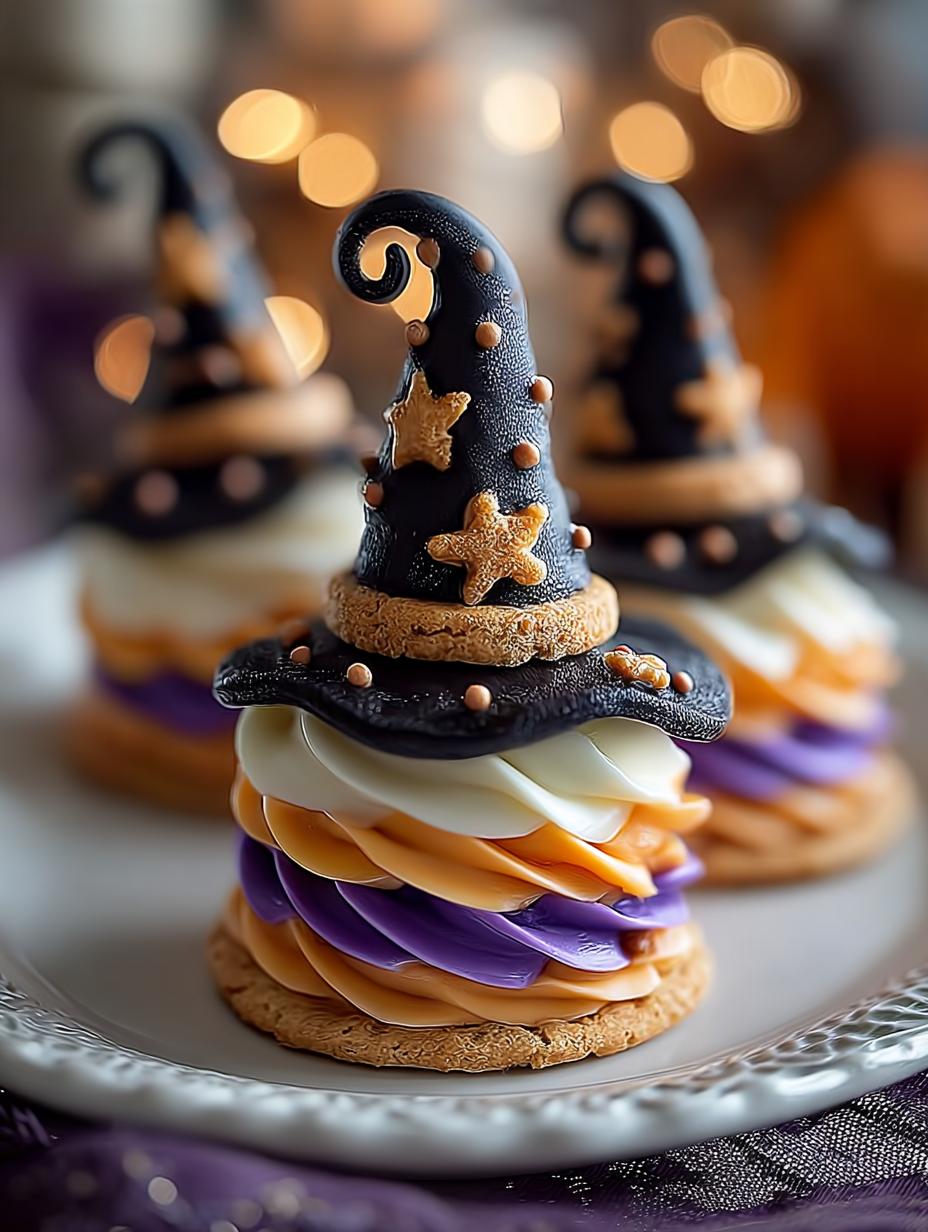
Fun Witch Hat Halloween cookies are the perfect spooky treat to add a delightful twist to your Halloween festivities. These cookies feature a rich peanut butter base, topped with a chocolate kiss and a vibrant purple-tinted peanut butter decoration. They not only look enchanting but taste delicious too. Whether you’re hosting a party or simply want to enjoy a festive dessert, these cookies are sure to impress both kids and adults alike!
Why You’ll Love This Fun Witch Hat Halloween
There are countless reasons to adore these Fun Witch Hat Halloween cookies! First, they are visually stunning and make for great conversation starters. Second, the combination of peanut butter and chocolate is irresistible. Third, they are simple to prepare, making them ideal for both beginner and seasoned bakers. Fourth, they provide a fun opportunity for kids to engage in Halloween-themed baking. Fifth, they can be customized with different colors and decorations, allowing for playful witch hat ideas. Lastly, these cookies are perfect for sharing at Halloween parties, ensuring everyone gets a taste of the fun!

Ingredients for Fun Witch Hat Halloween
Gather these items:
- 1 1/2 cups all-purpose flour
- 2 tsp cornstarch
- 1/2 tsp baking soda
- 1/4 tsp baking powder
- 1/8 tsp fine sea salt
- 1/2 cup unsalted butter, softened
- 1 cup white sugar
- 1 large egg
- 3/4 cup smooth peanut butter
- 1 tsp vanilla extract
- Purple gel food coloring
- Halloween sprinkles or purple sanding sugar
- 33 chocolate kisses or Hugs candies, unwrapped
How to Make Fun Witch Hat Halloween Step-by-Step
- Step 1: Whisk flour, cornstarch, baking soda, baking powder, and fine sea salt in a medium bowl. In a large bowl, cream softened butter and white sugar until light and fluffy. Beat in the large egg, smooth peanut butter, and vanilla extract until well combined. Gradually add the dry ingredients to the wet ingredients, mixing on low speed until just combined. Do not overmix.
- Step 2: Divide the dough into two equal portions. Flatten each portion into a disk, wrap tightly in plastic wrap, and refrigerate for at least 1 to 2 hours. Chilling is essential for easier handling and to prevent spreading.
- Step 3: Preheat your oven to 375°F (190°C). Line baking sheets with parchment paper. On a lightly floured surface, roll out one disk of chilled dough to about ¼-inch thickness. Use a 2-inch round cookie cutter to cut out circles. Transfer cookies to prepared baking sheets, leaving about an inch between each. Bake for 8-10 minutes, or until edges are lightly golden. Let cookies cool on the baking sheet for 5 minutes before transferring to a wire rack to cool completely.
- Step 4: In a small bowl, take about 1/4 cup of the smooth peanut butter and mix it thoroughly with purple gel food coloring until you achieve your desired Halloween hue and a smooth, spreadable consistency. If your peanut butter is stiff, warm it gently in the microwave for a few seconds to soften it for easier application.
- Step 5: Once the cookies are completely cool, spread a thin layer of the tinted purple peanut butter onto each cookie. Gently press one unwrapped chocolate kiss or Hug candy onto the center of each cookie, point-side up, to form the peak of the witch hat. The peanut butter will act as ‘glue’.
- Step 6: While the purple peanut butter is still soft, sprinkle Halloween sprinkles or purple sanding sugar around the base of the chocolate kiss or along the edge of the cookie. Allow the decorated Witch Hat Halloween cookies to sit for at least 30 minutes, or until the peanut butter decoration has set slightly, before serving or storing.
Pro Tips for the Best Fun Witch Hat Halloween
Keep these in mind:
- Chill the dough thoroughly to ensure that the cookies maintain their shape while baking.
- Experiment with different colors for the peanut butter decoration to create colorful witch hat styles.
- Use a variety of Halloween-themed sprinkles to make your cookies stand out.
- Ensure that the chocolate kisses are pressed firmly onto the cookie for a better hold.
Best Ways to Serve Fun Witch Hat Halloween
These cookies are fantastic on their own, but why not elevate your Halloween gathering? Serve them alongside other fun Halloween witch accessories like themed plates or napkins. They also pair well with a glass of milk or hot cocoa for a cozy touch!
How to Store and Reheat Fun Witch Hat Halloween
Store your Witch Hat Halloween cookies in an airtight container at room temperature for up to a week. If you prefer them warm, simply pop them in the microwave for a few seconds before serving.
Frequently Asked Questions About Fun Witch Hat Halloween
What’s the secret to perfect Fun Witch Hat Halloween?
The secret lies in chilling the dough adequately. This prevents spreading, ensuring that your cookies maintain their witch hat shape while baking.
Can I make Fun Witch Hat Halloween ahead of time?
Absolutely! You can prepare the cookie dough a day in advance and refrigerate it. Just roll and bake when you’re ready to decorate!
How do I avoid common mistakes with Fun Witch Hat Halloween?
To avoid overbaking, keep an eye on the cookies during the last few minutes in the oven. They should be just golden at the edges when done.
Variations of Fun Witch Hat Halloween You Can Try
Feel free to experiment with different flavors! You can substitute peanut butter with almond or cashew butter for unique tastes. Additionally, try using various chocolate candies for the tops, like Reese’s Pieces or M&Ms, to create unique witch hat costumes that are fun and festive!
For more Halloween treats, check out our dessert category for inspiration. If you’re interested in other cookie recipes, consider trying our Peanut Butter Rice Krispie Bars or Strawberry Shortcake Cookies. You can also explore latest recipes for more delicious ideas!
Print
Fun Witch Hat Halloween Cookies to Spook Your Guests
- Total Time: 260 min
- Yield: 33 cookies 1x
- Diet: Vegetarian
Description
These delightful Witch Hat Halloween Cookies feature a rich peanut butter cookie base, topped with a chocolate kiss and festive purple-tinted peanut butter decoration, making them a fun and spooky treat for any Halloween celebration.
Ingredients
- 1 1/2 cups all-purpose flour
- 2 tsp cornstarch
- 1/2 tsp baking soda
- 1/4 tsp baking powder
- 1/8 tsp fine sea salt
- 1/2 cup unsalted butter, softened
- 1 cup white sugar
- 1 large egg
- 3/4 cup smooth peanut butter
- 1 tsp vanilla extract
- Purple gel food coloring
- Halloween sprinkles or purple sanding sugar
- 33 chocolate kisses or Hugs candies, unwrapped
Instructions
- Whisk flour, cornstarch, baking soda, baking powder, and fine sea salt in a medium bowl. In a large bowl, cream softened butter and white sugar until light and fluffy. Beat in the large egg, smooth peanut butter, and vanilla extract until well combined. Gradually add the dry ingredients to the wet ingredients, mixing on low speed until just combined. Do not overmix.
- Divide the dough into two equal portions. Flatten each portion into a disk, wrap tightly in plastic wrap, and refrigerate for at least 1 to 2 hours. Chilling is essential for easier handling and to prevent spreading.
- Preheat your oven to 375°F (190°C). Line baking sheets with parchment paper. On a lightly floured surface, roll out one disk of chilled dough to about ¼-inch thickness. Use a 2-inch round cookie cutter to cut out circles. Transfer cookies to prepared baking sheets, leaving about an inch between each. Bake for 8-10 minutes, or until edges are lightly golden. Let cookies cool on the baking sheet for 5 minutes before transferring to a wire rack to cool completely.
- In a small bowl, take about 1/4 cup of the smooth peanut butter (from the 3/4 cup total) and mix it thoroughly with purple gel food coloring until you achieve your desired vibrant Halloween hue and a smooth, spreadable consistency. If your peanut butter is stiff, warm it gently in the microwave for a few seconds to soften it for easier application.
- Once the cookies are completely cool, spread a thin layer of the tinted purple peanut butter onto each cookie. Gently press one unwrapped chocolate kiss or Hug candy onto the center of each cookie, point-side up, to form the peak of the witch hat. The peanut butter will act as ‘glue’.
- While the purple peanut butter is still soft, sprinkle Halloween sprinkles or purple sanding sugar around the base of the chocolate kiss or along the edge of the cookie. Allow the decorated Witch Hat Halloween Cookies to sit for at least 30 minutes, or until the peanut butter decoration has set slightly, before serving or storing.
Notes
- Prep Time: 120 min
- Cook Time: 10 min
- Category: Dessert
- Method: Baking
- Cuisine: American
Nutrition
- Serving Size: 1 cookie
- Calories: 150
- Sugar: 10g
- Sodium: 50mg
- Fat: 7g
- Saturated Fat: 3g
- Unsaturated Fat: 4g
- Trans Fat: 0g
- Carbohydrates: 20g
- Fiber: 1g
- Protein: 3g
- Cholesterol: 15mg
Keywords: Halloween Cookies, Witch Hat Cookies, Peanut Butter Cookies