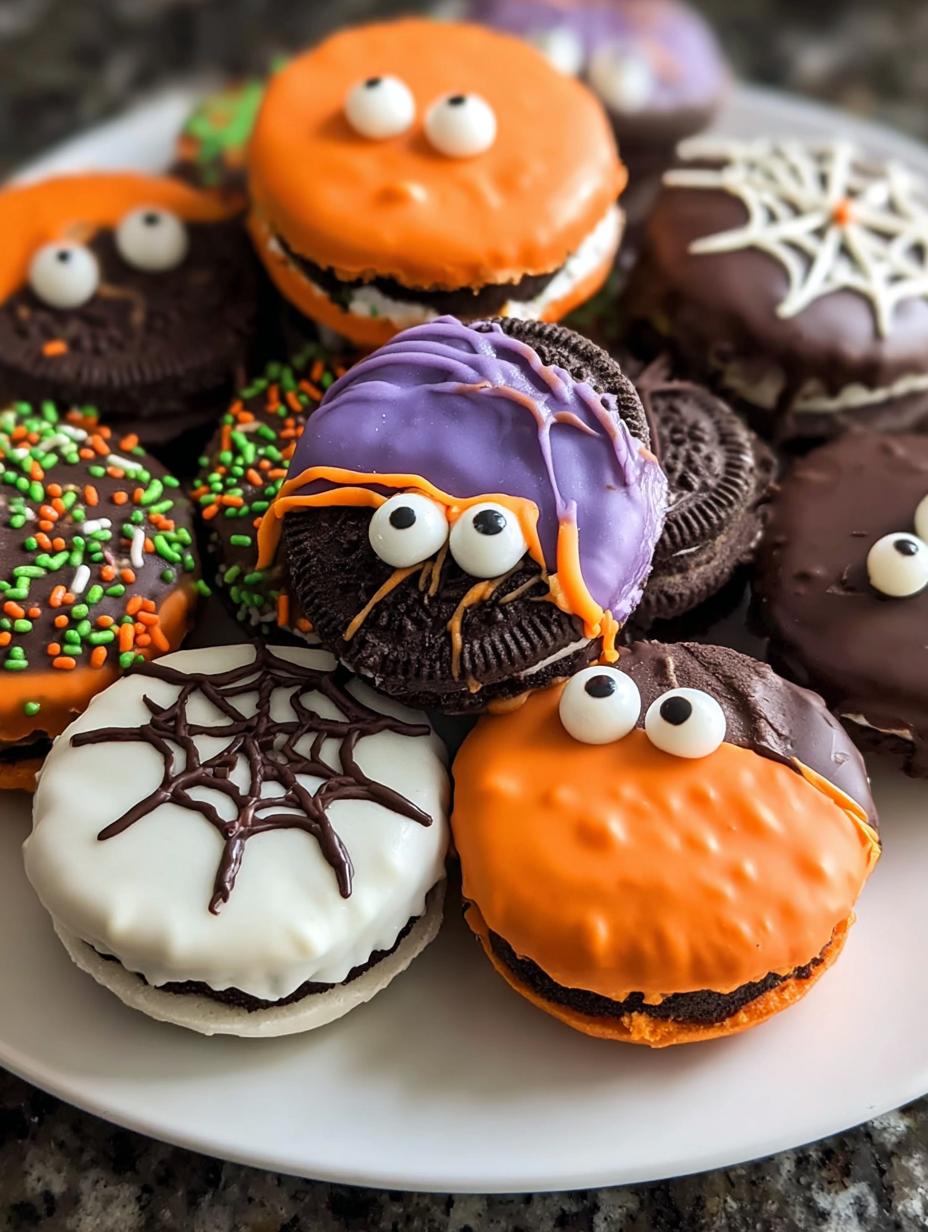
Spooky chocolate covered Halloween cookies have been my go-to for years, transforming ordinary Oreos into festive delights that always bring a smile. I remember my first attempt years ago; the kitchen was a joyful mess of colorful chocolate and flying sprinkles, and the smell of melting chocolate filled the air. These aren’t just treats; they’re edible decorations that make any Halloween party pop. They’re so easy to make, even if you’re new to candy making, and the kids absolutely adore them. Let’s get these spooky chocolate Halloween treats made!
Why You’ll Love These Spooky Chocolate Covered Halloween Treats
These aren’t just any cookies; they’re a whole mood for your Halloween festivities! Here’s why you’ll be obsessed:
- Effortless Magic: You get maximum spooky impact with minimal kitchen time.
- Kid-Friendly Fun: Get the little ones involved in decorating these DIY spooky chocolate Halloween snacks!
- Customizable Creativity: Tailor each cookie to your specific spooky chocolate Halloween ideas.
- Party Perfect: They make fantastic spooky chocolate Halloween party favors that guests will rave about.
- Impressive Presentation: These treats look like they came from a professional bakery, but you made them!
- Deliciously Simple: The classic Oreo crunch meets smooth, sweet chocolate – a winning combo every time.
- Versatile Decorations: Perfect for Halloween spooky candy making projects of all skill levels.
Ingredients for Spooky Chocolate Covered Halloween
Gather these simple items to create your Halloween chocolate spooky recipes:
- 1 standard package (36-40) Oreo cookies – the perfect base for our spooky chocolate Halloween creations
- 12 oz white melting chocolate or candy melts – great for vibrant colors and details
- 12 oz dark chocolate melting wafers or candy melts – ideal for deep, rich colors and spiderweb designs
- Oil-based gel food coloring (orange, purple, green, black) – essential for achieving those Halloween spooky colors without seizing the chocolate
- Assorted Halloween sprinkles (jimmies, nonpareils, shaped sprinkles) – for adding festive crunch and visual appeal
- Edible glitter (optional) – adds a magical shimmer to your ghostly chocolate Halloween treats
- Edible googly eyes (various sizes) – for bringing your monster chocolate Halloween creations to life!
- Popsicle or lollipop sticks (optional) – makes for easy handling and fun party favors
- 1-2 tsp vegetable shortening or refined coconut oil (optional, for thinning chocolate) – helps achieve the perfect dipping consistency

How to Make Spooky Chocolate Halloween Treats
Let’s dive into creating these amazing Halloween chocolate spooky recipes! It’s a fun process that yields incredibly delicious results.
- Step 1: Preheat your oven to 350°F (175°C). Line two large baking sheets with parchment paper. Gather your tools: microwave-safe bowls, spoons, toothpicks, and small containers for sprinkles. Deep, narrow bowls are your best friends for dipping.
- Step 2: Melt half of the white chocolate in a microwave-safe bowl. Heat in 30-second intervals, stirring well after each, until it’s smooth and creamy. If it seems too thick to coat properly, stir in ½-1 tsp of shortening or coconut oil until it reaches a good dipping consistency.
- Step 3: Divide the melted white chocolate into separate bowls. Add a few drops of oil-based gel food coloring to each bowl – think orange, purple, and green for that classic Halloween feel. Stir each until the color is uniform and vibrant. Don’t forget to keep some white chocolate plain for intricate details!
- Step 4: Melt the dark chocolate in a separate bowl using the same 30-second interval method, stirring until smooth. Thin with a tiny bit of shortening or coconut oil if needed to ensure a smooth coating.
- Step 5: Get everything ready for decorating! Have all your melted chocolates, sprinkles, and edible googly eyes within easy reach. If you’re making them on sticks, now’s the time to gently insert a popsicle or lollipop stick into the cream filling of each Oreo for easy handling.
- Step 6: Submerge each Oreo cookie completely into your chosen melted chocolate color. Use a fork or a specialized dipping tool to ensure full coverage.
- Step 7: Lift the coated Oreo and let any excess chocolate drip back into the bowl. Gently tap the bottom edge of the fork against the bowl’s rim to create a smooth, even coating. Scrape the very bottom edge lightly to prevent drips when it sets.
- Step 8: Immediately place the dipped Oreo onto the prepared parchment paper. While the chocolate is still wet, go wild with your Halloween sprinkles! This is where the fun really begins.
- Step 9: If you’re adding googly eyes to create monster chocolate Halloween creations, gently press them into the wet chocolate now. They’ll stick perfectly in place.
- Step 10: Repeat this dipping and decorating process for all your Oreos. Once decorated, place the baking sheets in the refrigerator for about 10-15 minutes, or until the chocolate is completely set and firm to the touch.
- Step 11: Melt the remaining white chocolate or a fresh small batch for drizzling. Thin it with just a tiny bit more shortening or coconut oil if it’s too thick for drizzling.
- Step 12: Transfer the thinned drizzle chocolate into a piping bag fitted with a small tip, or a Ziploc bag with a tiny corner snipped off. Drizzle in fun zigzag patterns over your set cookies.
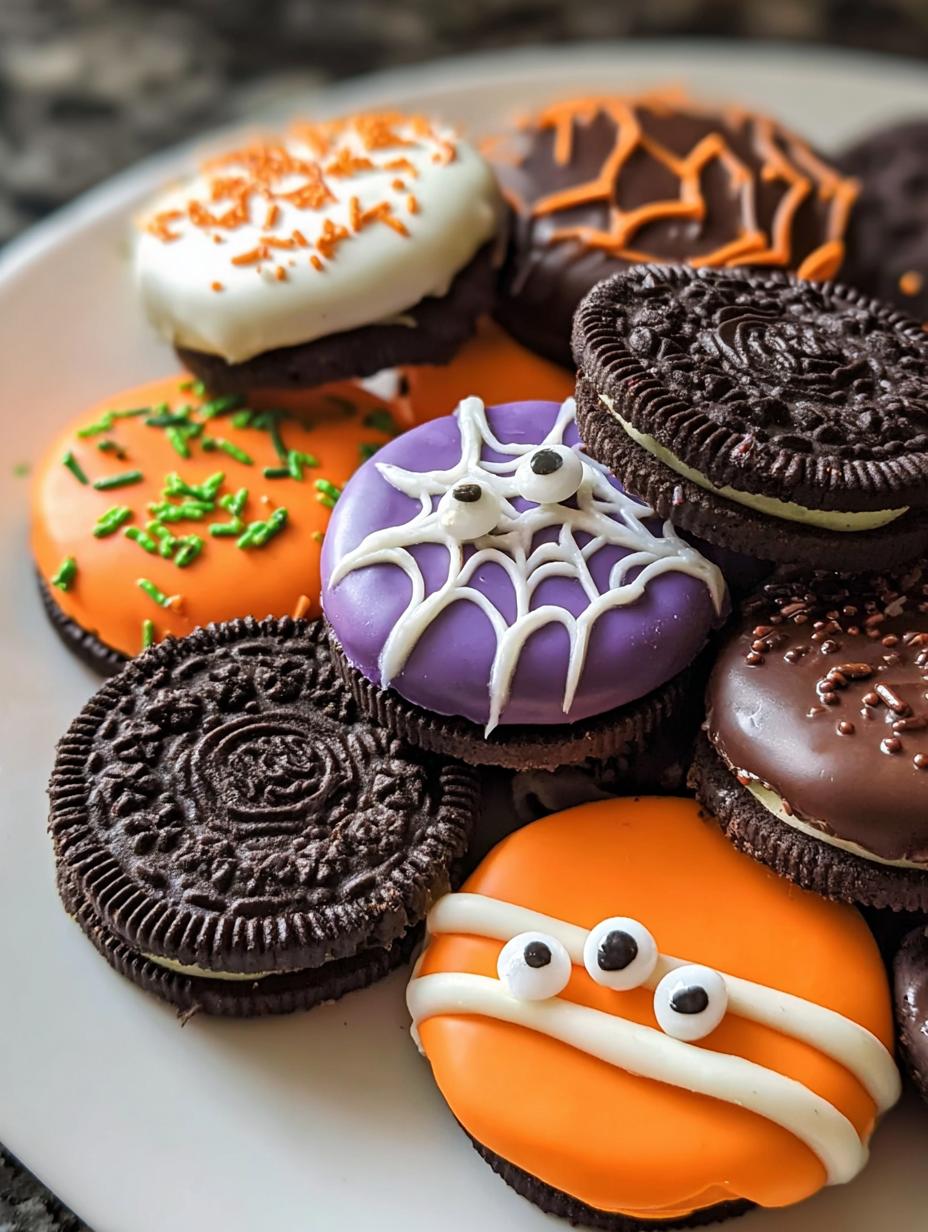
- Step 13: For Mummy Oreos: Dip Oreos in white chocolate and let them set. Then, drizzle thin white chocolate lines across them, leaving a small gap. Place two googly eyes in that gap while the chocolate is still wet. Let them set completely.
- Step 14: For Spiderweb Oreos: Dip your Oreo in dark chocolate and let it set. While the chocolate is still wet, pipe a white chocolate spiral starting from the center. Then, take a toothpick and drag it from the center outwards to create a web pattern. Wipe your toothpick clean between each drag to keep your lines crisp.
- Step 15: For an extra touch of magic on your ghostly chocolate Halloween treats, dust them with edible glitter while the decorations are still slightly soft.
- Step 16: Allow all your decorated cookies to set completely. This usually takes another 10-15 minutes in the fridge or about 30-60 minutes at room temperature.
- Step 17: Store your Easy Spooky Chocolate Covered Halloween Dipped Oreos in an airtight container at room temperature for up to two weeks. If you need to stack them, place parchment paper between the layers to prevent sticking.
Melting Chocolate for Halloween Treats
Melting chocolate properly is key to smooth, beautiful coatings. For the best results with your Halloween chocolate spooky recipes, use the microwave method in 30-second intervals, stirring thoroughly between each. Alternatively, a double boiler works wonderfully. The most important tip is to avoid getting any water near the chocolate, as this can cause it to seize and become lumpy. For more tips on chocolate work, check out this guide to chocolate.
Decorating Your Spooky Chocolate Halloween Creations
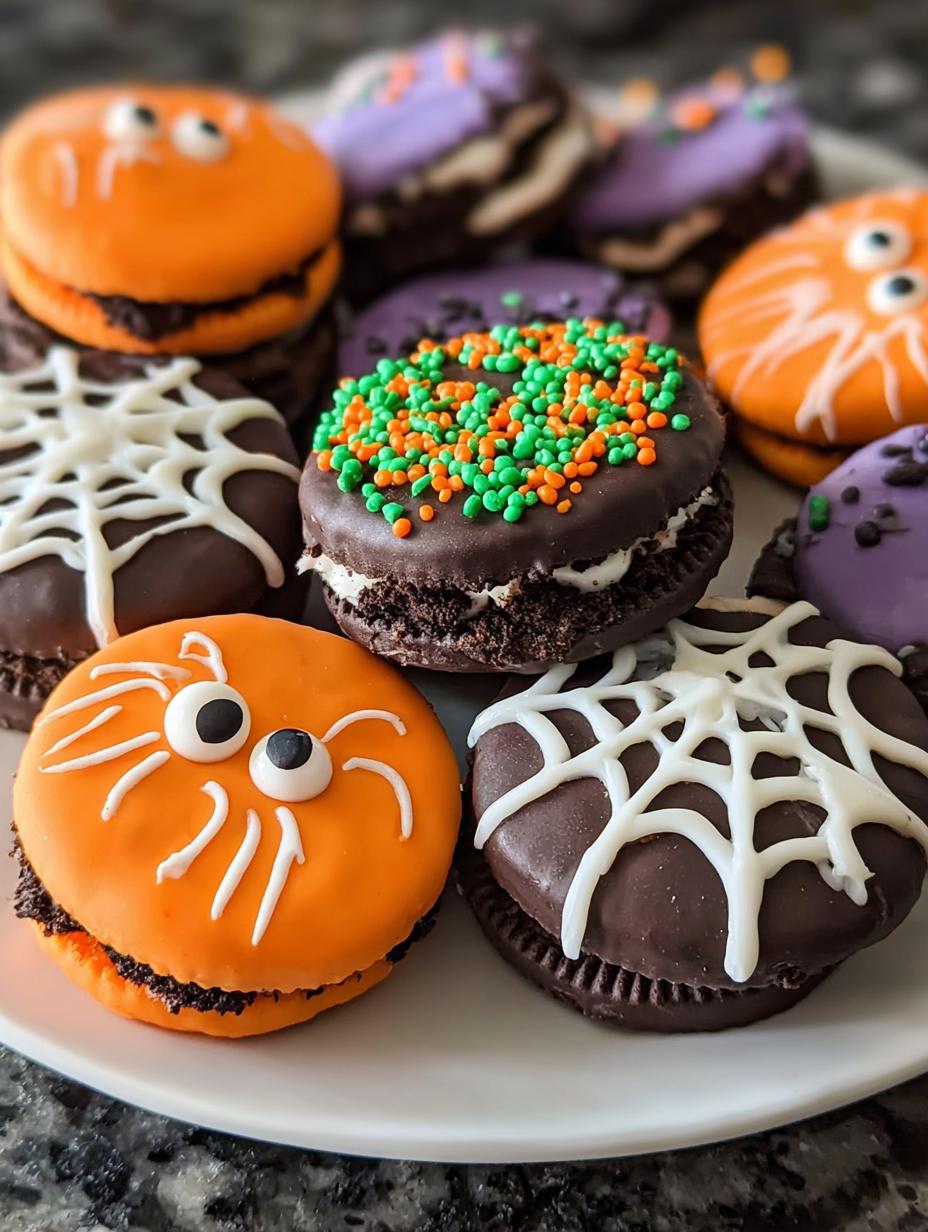
Once your Oreos are dipped, it’s time for the fun part! Apply sprinkles immediately while the chocolate is wet so they adhere well. For drizzles, a piping bag or a Ziploc with a snipped corner gives you control. To create mummy Oreos, simply drizzle thin lines of white chocolate and add two googly eyes. For a spiderweb effect, pipe a spiral of contrasting chocolate and drag a toothpick from the center outwards. These techniques turn simple cookies into creative spooky chocolate Halloween creations. You can find more dessert ideas here.
Pro Tips for the Best Spooky Chocolate Halloween Desserts
Want your Halloween chocolate spooky recipes to look like they came from a professional bakery? I’ve picked up a few tricks over the years that make a huge difference. These simple adjustments ensure your spooky chocolate Halloween ideas turn out perfectly every time, impressing everyone who tries them.
- Always use high-quality melting chocolate or candy melts; they’re designed for easy melting and hardening.
- Work in a cool environment if possible, as warm temperatures can make the chocolate melt too quickly.
- Don’t overcrowd your parchment paper; give each cookie a little space to set without touching.
- Have all your decorations ready to go *before* you start dipping. Speed is key!
What’s the secret to perfectly coated Spooky Chocolate Covered Halloween cookies?
The secret is in the consistency of your melted chocolate. It needs to be fluid enough to coat smoothly but not so thin that it drips off. Adding a tiny bit of shortening or coconut oil helps achieve that perfect, glossy finish for your spooky chocolate Halloween treats. This is a common technique in baking.
Can I make Spooky Chocolate Halloween treats ahead of time?
Absolutely! These are fantastic make-ahead Halloween chocolate spooky recipes. Store them in an airtight container at room temperature for up to two weeks. Just make sure they are completely set before sealing the container to prevent condensation.
How do I avoid common mistakes with Spooky Chocolate Halloween?
The biggest pitfall is water contamination, which seizes chocolate. Always use dry bowls and utensils. Also, be patient and let the chocolate set fully between layers of decoration; rushing this step leads to smudges and messy spooky chocolate Halloween creations. For more baking tips, explore our latest recipes.
Best Ways to Serve Spooky Chocolate Halloween Party Favors
These festive treats are more than just candy; they’re edible decorations that elevate any Halloween gathering. For a show-stopping dessert table, arrange them artfully alongside other Halloween spooky candy making creations like cupcakes or a spooky chocolate Halloween bark. They also make fantastic individual spooky chocolate Halloween party favors! Tie a ribbon around the baggie they’re stored in and place one at each guest’s setting for a delightful surprise. For a fun twist, serve them with a glass of cold milk or a warm mug of spiced apple cider, letting the chocolate melt slightly into the drink for an extra decadent experience.
Nutrition Facts for Spooky Chocolate Covered Halloween
Per cookie (recipe yields 36-40 cookies):
- Calories: Approx. 150-200 (varies by Oreo type and chocolate amount)
- Fat: Approx. 8-12g
- Saturated Fat: Approx. 4-6g
- Protein: Approx. 1-2g
- Carbohydrates: Approx. 20-25g
- Fiber: Approx. 1g
- Sugar: Approx. 15-20g
- Sodium: Approx. 50-70mg
Nutritional values are estimates and may vary based on specific ingredients used for your spooky chocolate Halloween creations.
How to Store and Reheat Spooky Chocolate Halloween Snacks
Proper storage is key to keeping your spooky chocolate Halloween snacks fresh and delicious for your party or as DIY spooky chocolate Halloween snacks to enjoy later. Once your cookies are completely cool and the decorations are set – this is super important to avoid condensation – transfer them to an airtight container. You can layer them with parchment paper between each layer if you’re stacking them to prevent sticking. Stored this way at room temperature, your Halloween chocolate spooky recipes will stay tasty for up to two weeks. If you need to keep them longer, pop them in the freezer for up to three months; just ensure they’re well-wrapped to prevent freezer burn. When you’re ready to enjoy them, thaw them overnight in the refrigerator for the best texture. Reheating isn’t usually necessary for these treats, as they’re best served at room temperature after thawing, ensuring that delightful cookie crunch and smooth chocolate coating.
Frequently Asked Questions About Spooky Chocolate Halloween
What are spooky chocolate Halloween treats made of?
At their heart, these delightful Halloween chocolate spooky recipes start with classic Oreo cookies. We then coat them in melted white or dark chocolate, transforming them into creative spooky chocolate Halloween creations. Edible decorations like sprinkles, googly eyes, and colorful drizzles add to their spooky charm.
Can I use regular chocolate chips instead of melting wafers for my spooky chocolate Halloween ideas?
While you can technically melt chocolate chips, they often contain stabilizers that make them thicker and harder to work with for coating. Melting wafers or candy melts are specifically designed to melt smoothly and set firm, giving you the best results for your DIY spooky chocolate Halloween snacks and ensuring a professional finish for your spooky chocolate covered Halloween treats.
How do I get the chocolate to stick to the Oreos for my spooky chocolate Halloween creations?
The key is ensuring your chocolate is the right consistency – not too thick, not too thin. Adding a little shortening or coconut oil helps achieve this perfect coating texture. Also, make sure the Oreos are at room temperature, not cold, as this can cause the chocolate to set too quickly and unevenly. Following the melting instructions carefully will help your spooky chocolate Halloween ideas stick perfectly. For more baking tips, check out our breakfast recipes.
What are some simple spooky chocolate Halloween desserts I can make with kids?
These chocolate-covered Oreos are perfect for kids! Let them help with the dipping and then go wild with sprinkles and edible googly eyes. Creating mummy Oreos by drizzling white chocolate and adding eyes is also a fun and easy activity. You can even let them design their own unique monster chocolate Halloween creations. These simple spooky chocolate Halloween snacks are a fantastic way to bond in the kitchen.
Variations of Spooky Chocolate Halloween Ideas You Can Try
Feeling inspired to get creative with your Halloween spooky candy making? Beyond the classic dipped Oreos, there are so many fun ways to adapt these spooky chocolate Halloween ideas. You can easily make dietary variations to accommodate different needs, ensuring everyone can enjoy these festive treats. Consider using gluten-free cookies as your base for a gluten-free spooky chocolate Halloween dessert, or explore dairy-free chocolate alternatives if needed. For a different texture, try making spooky Halloween chocolate bark by spreading melted chocolate thin and scattering toppings, or even dipping pretzel rods for a salty-sweet contrast. These simple swaps allow you to create a wide array of creative spooky chocolate Halloween delights perfect for any party.

Spooky Chocolate Halloween: 3 Easy Monster Cookie Ideas
- Total Time: 2 Hours
- Yield: 36-40 cookies 1x
- Diet: Vegetarian
Description
Transform simple Oreo cookies into spectacular Halloween treats with minimal effort. This no-bake recipe combines classic Oreos with vibrant chocolate coatings and playful, eerie charm, perfect for any Halloween gathering or family activity.
Ingredients
- 1 standard package (36-40) Oreo cookies
- 12 oz white melting chocolate or candy melts
- 12 oz dark chocolate melting wafers or candy melts
- Oil-based gel food coloring (orange, purple, green, black)
- Assorted Halloween sprinkles (jimmies, nonpareils, shaped sprinkles)
- Edible glitter (optional)
- Edible googly eyes (various sizes)
- Popsicle or lollipop sticks (optional)
- 1–2 tsp vegetable shortening or refined coconut oil (optional, for thinning chocolate)
Instructions
- Line baking sheets with parchment paper. Gather microwave-safe bowls, spoons, toothpicks, and small containers for sprinkles. Deep, narrow bowls work best for dipping.
- Melt half of the white chocolate in a microwave-safe bowl in 30-second intervals, stirring until smooth. If too thick, add ½-1 tsp shortening or coconut oil.
- Divide melted white chocolate into separate bowls (for orange, purple, green). Add oil-based gel food coloring, stirring until uniform. Keep some white chocolate uncolored for details.
- Melt dark chocolate in a separate bowl using 30-second intervals, stirring until smooth. Thin with shortening or coconut oil if needed.
- Have all melted chocolates, sprinkles, and googly eyes ready. (Optional: Insert popsicle sticks into Oreos for easy handling).
- Submerge each Oreo completely into a chosen melted chocolate color. Use a fork or dipping tool.
- Lift the Oreo and gently tap off excess chocolate against the bowl rim for a smooth, even coating. Lightly scrape the bottom edge.
- Immediately place dipped Oreo on parchment paper. While chocolate is wet, generously apply Halloween sprinkles.
- (Optional): Gently press edible googly eyes onto the wet chocolate.
- Repeat for all Oreos. Refrigerate baking sheets for 10-15 minutes until chocolate is completely set.
- Melt remaining chocolate or a fresh small batch for drizzling. Thin with a tiny bit more shortening or coconut oil if too thick.
- Transfer drizzle chocolate to a piping bag (or Ziploc with snipped corner). Drizzle in zigzag patterns over set Oreos.
- For Mummy Oreos: Dip in white chocolate, set. Drizzle thin white chocolate lines, leaving a gap. Place two googly eyes in the gap while wet. Let set.
- For Spiderweb Oreos: Dip Oreo in dark chocolate. While wet, pipe a white chocolate spiral. Drag a toothpick from the center outwards to create a web pattern, wiping clean between drags.
- (Optional): Dust edible glitter onto set, decorated Oreos for shimmer.
- Allow all decorations to set completely (10-15 minutes in fridge or 30-60 minutes at room temperature).
- Store your Easy Spooky Chocolate Covered Halloween Dipped Oreos in an airtight container at room temperature for up to two weeks, or in the refrigerator. Use parchment between layers if stacking.
Notes
- Use oil-based or candy-specific food coloring for best results; water-based coloring can cause chocolate to seize.
- Thin chocolate with a very small amount of shortening or coconut oil if it becomes too thick for dipping or drizzling.
- For cleaner drizzles, use a piping bag with a very small tip or a Ziploc bag with a tiny corner snipped off.
- Store in an airtight container at room temperature for up to two weeks.
- Prep Time: 20 Minutes
- Cook Time: 0 Minutes
- Category: Desserts
- Method: No-Bake
- Cuisine: American
Nutrition
- Serving Size: 1 cookie
- Calories: Approx. 150-200 (varies by Oreo type and chocolate amount)
- Sugar: Approx. 15-20g
- Sodium: Approx. 50-70mg
- Fat: Approx. 8-12g
- Saturated Fat: Approx. 4-6g
- Unsaturated Fat: Approx. 4-6g
- Trans Fat: 0g
- Carbohydrates: Approx. 20-25g
- Fiber: Approx. 1g
- Protein: Approx. 1-2g
- Cholesterol: Approx. 0-5mg
Keywords: Spooky Chocolate Covered Halloween, Spooky chocolate Halloween treats, Chocolate covered spooky Halloween ideas, Halloween chocolate spooky recipes, Easy spooky chocolate Halloween desserts, DIY spooky chocolate Halloween snacks, How to make spooky chocolate Halloween, What are spooky chocolate Halloween, Why are chocolate covered Halloween spooky, Spooky chocolate Halloween party favors, Dark chocolate spooky Halloween, White chocolate spooky Halloween, Halloween spooky candy making, Creative spooky chocolate Halloween, Best spooky chocolate Halloween, Simple spooky chocolate Halloween, Spooky chocolate Halloween decorations, Ghostly chocolate Halloween treats, Monster chocolate Halloween creations, Spiderweb chocolate Halloween, Spooky Halloween chocolate bark